Studying chromosomes in order to detect abnormalities is the main objective of doing karyotyping. The process of karyotyping is time-consuming and tedious, that we all know. But it is very important for prenatal screening.
We have to process samples for at least 3 days to make a proper karyotype, mistake or mishandling at any day or step can cause results failure and failure is not an option in cytogenetics.
There are two reason for that,
One, the sample is precious, we are collecting fetus samples either chorionic villi or amniotic fluid and for that, we have put the fetus under the risk of miscarriage. So obviously we can’t collect samples repeatedly.
Second, the pain she endured during sample collection is unbearable. So we have to get results anyhow. A person should have enough experience to karyotype a sample at least for a fetus or prenatal sample.
Don’t be scared! It is not as hard as you think. In this article, I will share with you some of the proven tips and tricks I had used in my lab to get a karyotype. Trust me this works. To make yourself a master in cytogenetics and karyotyping you have to learn it and try it in your lab.

1. Sample processing time
One of the important factors in getting results during karyotyping is the time. The sample must be processed as soon as possible. A sample should be cultured within 24 hours after collection.
As the time increases the chance of obtaining metaphase number decreases. More number of metaphase plates makes it easy to interpret results.
2. Sample collection tube:
Not all the sample types are good for karyotyping. For example, blood collected in EDTA vial can’t be cultured. The EDTA functions as an anticoagulant and is harmful to viable cells and so the lithium heparin too.
I strongly recommended using Sodium heparin tubes to collect blood samples for cytogenetic studies.
For amniotic fluid and chorionic villi, the sample can be collected in RPMI-1640 medium.
3. Selection of culture media:
Culture media is a vital factor to grow cells, without proper culture media and ingredients cells die. For example, use the complete RPMI-1640 culture media for cell culture from the blood. Different samples have different media requirements.
I had worked on both ready to use and in house prepared culture media. Trust me preparing culture media in a lab is a very tiresome job but you can save money.
I strongly recommend using ready-to-use culture media. The chance of contamination is high in lab prepared culture media. That is why all students I strongly advise to use the ready to use complete media for tissue culture, especially for the peripheral blood lymphocyte culture.
Related article: Definition of karyotype.
4. Sterility and contamination:
We are culturing cells right! So any type of cell can grow. If our culture gets contaminated, our experiment fails. Microbes can easily grow with a culture that suppresses our cell growth.
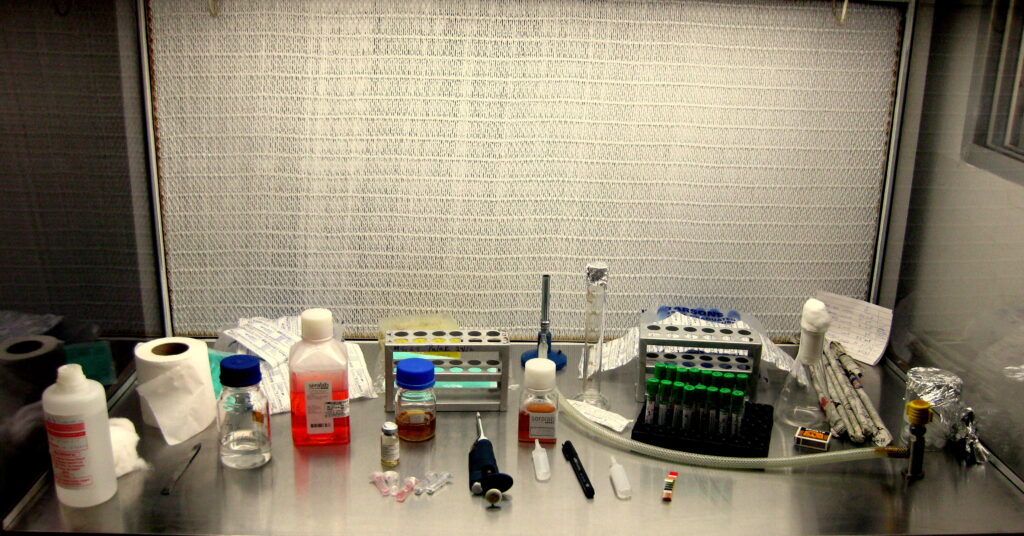
So to make culture contamination free is very important. During cell culture maintain strict sterile conditions. To achieve sterility before starting the experiments, decontaminate the laminar hood or safety cabinet with UV light for 5 min, wash all the glassware and plastic wares with 70% alcohol.
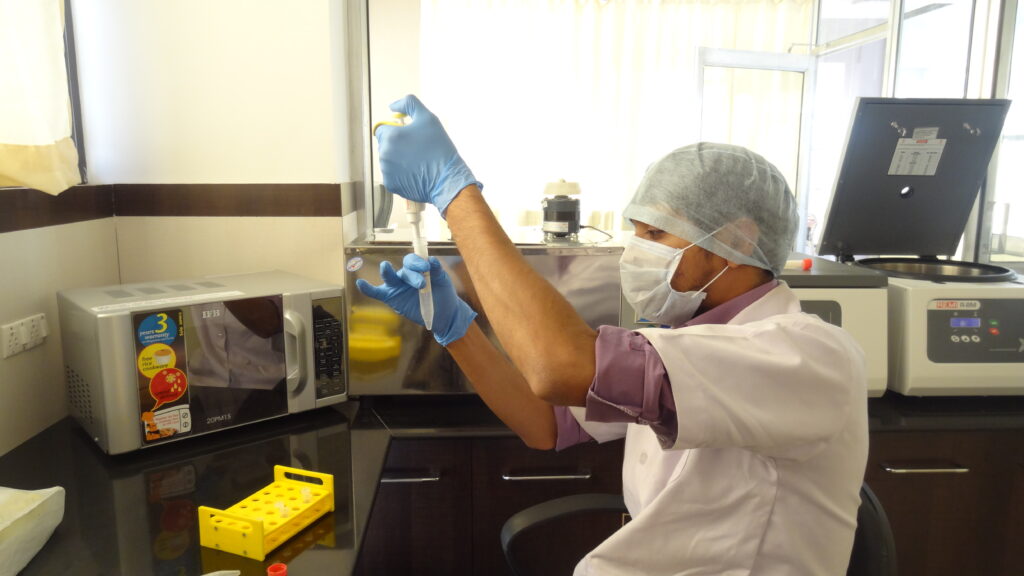
Use mouth and head cape and gloves. Out set of laminar with all the autoclaved utilities are given below. First we wrap all the glass and plasticware with paper and then autoclave it.

5. Use of chemicals:
Unlike the DNA extraction, here with the cell culture, you should have to maintain every chemical properly. I am explaining what i mean by “maintaining”.
For instance, after the addition of culture media wipe the mouth of the media tube with 70% alcohol and cap it. After that seal it with parafilm. After completion of the experiment, immediately transfer it to -20°C deep freeze otherwise, it becomes either contaminated or ineffective.
Likewise you have to maintain every chemical. Open it, use it , wipe it, close it and cover with parafilm.
Note: not all the karyotyping chemicals are stored in the deep freeze. Follow the manufacturer’s instructions for storing and maintaining it.
6. Culture incubation:
I strongly advise using a CO2 incubator. However, a normal incubator can also be used, but not advised to use for fetus sample.
Ok, so the time and conditions of incubation decides how much cell growth we will get. It is not necessary that we have to culture for 72 hours, for a shorter culture we can incubate samples for 48 hours as well but we get less metaphase cells.
Culture cells at 37°C temperature for 72 hours. Place all the tubes at 45° tilt so that the cell can get a surface. Mix culture twice in two days.
Note: do not use the incubator which is used for microbiology and bacterial cell culture experiments. Your culture will get contaminated.
Further read: What is a karyotyping test?
7. Concentration of chemicals
The concentration of every chemical used in the entire procedure of karyotyping has a great impact on the final results. For instance, use 8ml of culture media. I had noticed that if we use 10 or 12 ml of media, culture gets contaminated.
However, it may vary researcher to researcher. Some are still using 10ml culture media. The concentration of quantity of every chemical is given into the table below,
| Chemical | Quantity |
| RPMI-1640 | 10 ml |
| L-glutamine | 200ml |
| Etbr | 1mg/ml |
| Colchicine | 2mg/10ml |
| KCl | 0.56% |
| Fixative | 3:1(methanol: glacial acetic acid) |
Related article: What is karyotyping?- Definition, process, steps and advantages.
8. The mystery of hypotonic solution
One of the mysterious things in karyotyping is the use of hypotonic solutions. A person who mastered the skill of how to use ‘hypo’, trust me every time he or she will get excellent results.
Use 0.56% of KCl as a hypo. In our ebook (our experts are preparing it), we have explained the entire process of how to make a hypo and what is the exact concentration and pH for it.
We had performed karyotyping thousands of times. So our Hypotonic recipe is one of excellent. Download the ebook now.
Key: the last thing I can say about the hypo is that use every time a freshly prepared hypotonic solution.
9. Harvesting util crystal clear pellets
Washing is also important for removing debris and other undesirable things from our culture. Use 8 ml of fixative and wash cells until clear palettes obtain.

10. Preparing a slide
To prepare a slide of karyotyping is an art. Here we are using a chilled slide! Instead of a normal one. Again to understand the catch download our ebook.
Ok so put a few drops of culture from 2 to 3 feet heights. The reason is, dropping culture from some height can make cells burst and spread well.
Nonetheless, don’t drop it from too much height otherwise chromosomes of different cells get mixed.
Some tricks:
Use a chilled slide, as i said, chill it in 70% alcohol.
Add colchicine to the 70th hour of culture to prevent cell division further.
If a pinch of Etbr to the culture, it helps to elongate chromosomes. Note: handle EtBr carefully it is a carcinogenic.
Add only 0.2 to 0.5ml of samples to culture media.
Prefer to collect samples in the morning because after two days you have to harvest it. It takes at least two hour.
You can store the pellets and use it the next day.
Use only a freshly prepared hypotonic solution.
Read more: What does a human karyotype reveal?
Conclusion:
In conclusion, I can say that these tips and tricks definitely help you, though you need to have expertise or have to learn karyotype properly from some experts.
You have to learn not only cell culture but also how to interpret the karyotype.
The karyotype technique has greater utilities in prenatal screening and cancer genetics. Even in recent times too, this traditional technique is as useful as it was 20 years ago.


